40% Faster Deburring: No More Scratches or Rework (Proven Strategies for CNC Users)
68% of metal fabricators waste 2+ hours daily on manual deburring — that’s 10+ hours per week lost to a task that should take mere minutes..
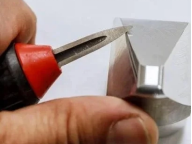
If you’re tired of watching your team struggle with hard-to-reach edges on irregular steel parts, this article is for you.
We’re not here to share with you a “magic tool” — we’re sharing proven, actionable strategies to slash deburring time, cut brush replacement costs, and boost your workshop’s overall efficiency. By the end, you’ll know exactly how to pick the right abrasive brush for your specific needs.
I. 3 Costly Deburring Mistakes You’re Making — Stop Wasting Money & Time
Before we share solutions, let’s highlight the common errors that drain your budget:
-
Choosing the wrong grit size
Most teams opt for a one-size-fits-all cheap abrasive brush — but the grit is either too coarse for soft metals (causing surface scratches) or too fine for hardened steel (failing to remove burrs effectively). Either way, it ends up damaging workpieces or wasting time.
-
Ignoring brush material compatibility
Our abrasive brushes are designed for use on metals with HRC ≤ 50 and burrs below 0.2mm. Applying them to unsuitable materials will result in bristle failure and poor performance, leading to frequent replacements and unnecessary rework.
-
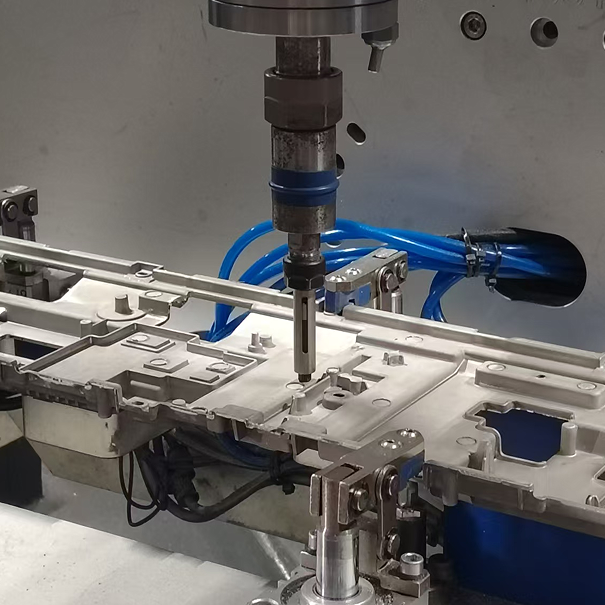
Overlooking tool adaptability
Our abrasive brushes are engineered for CNC machines and manual use — not for pneumatic tools. Mismatched tooling causes bristle failure, poor finishing, and constant replacements. These errors don’t just waste labor — they ruin product quality and erode your bottom line.
II. 4 Actionable Strategies to Boost Deburring Efficiency & Cut Costs
Here are the actionable steps to fix these problems, with technical details you can apply today:
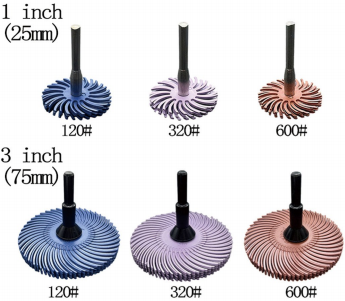
Strategy 1: Match Grit Size to Material Hardness (The #1 Rule)
Grit size isn’t a “one-size-fits-all” number — it’s a direct driver of efficiency.
Lower grit = larger abrasive particle size = coarser surface finish
Higher grit = finer abrasive particle size = smoother, brighter polished finish
Pro Tip: Test a small area first — if the brush leaves scratches, switch to a grit size 1–2 grades finer.
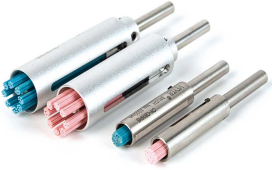
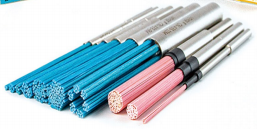
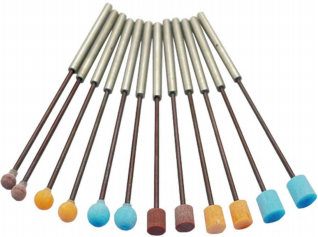
Strategy 2: Pick Brush Bristle Material for Your Workpiece
The right bristle material extends brush life by 3x and prevents damage:
Ceramic fiber bristles:
Blue bristles are suitable for steel, iron, and other metals, offering excellent wear resistance;
pink bristles are suitable for copper, aluminum, and other metals, ensuring high-precision finishing without surface scratches.
Ceramic bristles are suitable for aluminum alloys, offering good performance and cost-effectiveness.
Silicon carbide bristles are designed for aluminum parts, improving deburring efficiency by 25%.
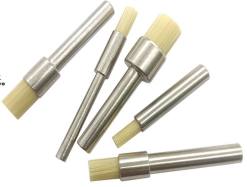
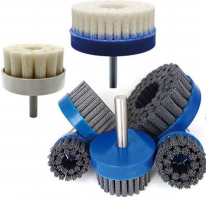
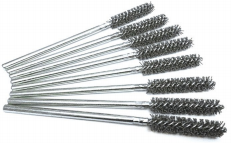
Strategy 3: Use the Right Brush Shape for Hard-to-Reach Areas
Irregular parts and complex geometries need specialized brush shapes:
Surface Brushes: For flat surfaces and straight edges.
Inner hole Brushes: For cross holes, inner holes, and internal edges — perfect for pipe fittings and engine parts.
Grinding wheel & grinding head: For cleaning threaded holes and tight corners — no more manual scraping.
Strategy 4: Optimize Rotational Speed to Avoid Brush Wear
A common mistake: Running your CNC machine or drill at maximum speed — this drastically shortens brush life and ruins finishing quality.
Brush rotational speed varies by model.
Critical Reminder: Refer to our product catalog for the recommended speed range for each brush type. Following these guidelines can extend brush lifespan by 40%.
III. Conclusion & Call to Action
Deburring doesn’t have to be a hassle. Match grit to material, pick the right bristle type, use specialized brushes, and optimize speed — you’ll cut deburring time by 40% easily.
Here’s your next step:
DM “Deburr” to get your free customized solution for your workpiece material.
Got questions about brush selection or strategies? Leave a comment — I’ll reply personally.